Are you wondering “how can I fix a bead leak in a tire?”. If yes, here is your right place!
In this article, we will guide you through everything you need to know about a bead leak in tire. Besides, you will be equipped with a step-by-step guide on how to fix it.
Let’s get started!
What Is A Bead Leak In Tire? (With Symptoms)
To put it simply, a bead leak in tire is when the tire loses air from the bead. The tire bead is located at the tire’s edge which sits on the rim. When your tire have a bead leak, it will go flat eventually if it is not repaired soon enough.
Now that you understand what a bead leak is, knowing its symptoms will help you easily identify it. That way, you wouldn’t be caught off-guard. Below are the signs of a bead leak in a tire:
- Vibration when steering
- Your tire keeps deflating
- Visible damage on your tire
While these symptoms point toward a possible bead leak, several tire issues also come with similar signs. So, here’s how you can efficiently check for a tire bead leak:
Step 1: Pour a teaspoon of dishwashing soap in a spray can
Step 2: Pour water into the spray can and spray the solution on the valve core, valve stem, rim, and tire.
Naturally, the soapy solution will create bubbles. However, if the tire indeed has a bead leak, you will notice the leak blow bubbles of its own.
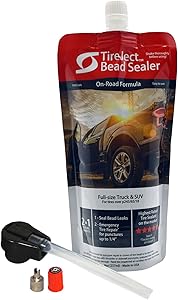
How To Fix A Bead Leak In Tire With TireJect Bead Sealer
Tools You Need
- Tireject bead sealer
- Air compressor or air pump

Step-by-step Guide
With the TireJect bead sealer, you don’t have to be an expert, nor do you need any tools to fix the leak. Why? Because it’s straightforward to use, and anyone with a guide can pull it off. Here’s how you can fix a bead leak with a TireJect bead sealer:
Step 1: Deflate the tire completely. In the TireJect kit, you will find a tool you can use to unscrew the valve stem core. After that, push the core so that the air in the tire comes out.
Step 2: Put the TireJect through the tire’s valve system. The 2 oz injector will help you screw onto the valve system. Then, you put the TireJect sealer into the injector and push it in the tire with the plunger.
Step 3: Screw back the valve system core into the stem after applying the sealer.
Step 4: Pump your tires. You can re-inflate the tire by using an air compressor or air pump. Ensure that the air pressure meets the recommended PSI for your tire.
Step 5: Drive around slowly for five minutes. It will help the sealer to slosh around inside the tire; thus, locating the bead leak and sealing it.
You have finally sealed your tire by using the TireJect sealer; easy, right? Now you need to check the air pressure once more to ensure no air is lost and no longer leaking. However, if you still notice a leak, the manufacturers advise that you apply additional 2 Oz of sealer.
How To Fix A Bead Leak In Tire With Tire Bead Sealer
Tools You Need
- Tire bead sealer
- Paintbrush
- Lug wrench
- Nose plier
- Tire lever/pry bar

Step-By-Step Guide
Both tubed and tubeless tires are susceptible to bead leaks. Therefore, identifying that your tire has a bead leak only means one thing; it’s time for a repair. Here is a step-by-step guide on fixing a bead leak with a tire bead sealer:
Step 1: Jack up your vehicle and set up wheel wedges. Use a lug wrench or impact to remove the lug nuts from the tire and then unmount the tire.
Step 2: Deflate the tire so that you can separate it from its rim. You can quickly do this by using a nose plier to unscrew the metallic part of the stem while twisting counterclockwise. Keep in mind that you should unscrew it gently for safety reasons.
Step 3: Separate the rim from the tire. To make it easier, you can apply lubricant (dishwashing liquid) around the rim area. You now push down the tire with your feet and then use a tire lever or pry bar to lift the rubber from the rim. Once you lift the rubber, you can easily remove the rim.
Step 4: Clean the rim after separating it, as the rim could be corroded or rusty. Sandpaper (preferably 150 grit sandpaper) is recommended. Also, proceed to clean the tire’s sidewall and inside the tire because dirt would have gathered.
Step 5: Apply the tire bead sealer by using a paintbrush and ensure that you clean the valve system afterward.
Step 6: Fit the rim back into the tire and use the paintbrush to apply the tire bead sealer on the sidewall. Ensure that you leave no dry spots when applying.
Step 7: Inflate the tire after it is dry. When finished, check for leakage once more. If none, proceed to install the tire back into the vehicle.
Step 8: Lastly, do a test ride to ensure the tires are working correctly. Check the pressure after 72 hours (3 days) to see if it dropped. Provided that you followed the steps correctly, the air pressure in the tire would not deplete.
How Much Does It Cost To Bead Leak In Tire?
If you have the skill and necessary information, repairing a bead leak in tire doesn’t cost much. You need a tire bead sealer which goes for $15 – $20 on average, and some basic repair kit for tires, including jacks, levers, pliers, etc.
However, if you’d rather save yourself time and effort, you can take it to a tire repair shop. The cost for the repair will depend on the product you require and the labor involved. It could be around $65 and up.
Conclusion
A tire bead leak can be problematic if not taken care of as soon as possible. Thanks to this guide, you can not only identify the symptoms of a bead leak, but also know how to fix it. Driving on a tire with a bead leak will be potentially dangerous because it will lead to a flat tire over time. Eventually, a tire blowout could easily happen. With that in mind, ensure to fix the leak bead in tire ASAP!
Read more: Tire Sealant For Slow Leak [Best Products 2022 Review]